I wanted a quick and easy project to fill a couple of hours this afternoon. Deciding to do a little herb garden on the veranda I came up with the idea of creating a wicking bed with a difference – one with 4 different soil levels to accommodate the different moisture needs of various herbs.
Now anyone who is familiar with Herb Spirals will already know this concept. As the garden spirals up higher the soil becomes more dry. Herbs are planted according to their moisture requirements (and sunlight requirements by using north, south, east and west aspects of the Herb Spiral).
I intended to use the same concept of soil height to create different moisture levels in the soil, but also combine this in a mini wicking bed so I am not having to water my herbs so often.
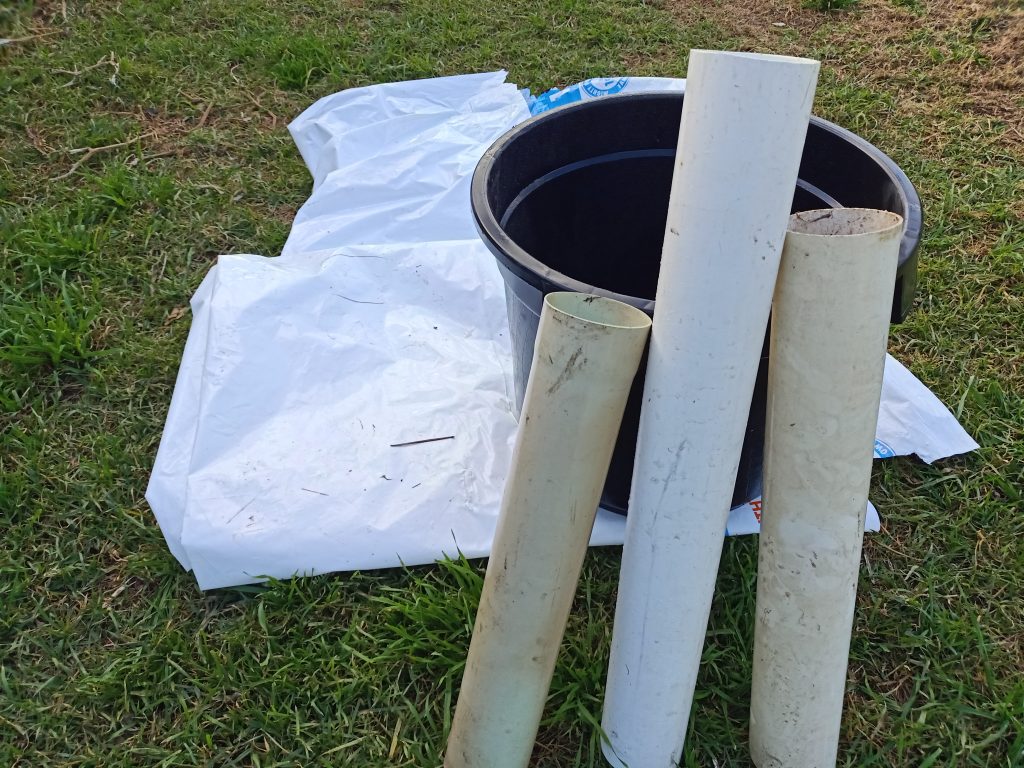
I gathered up my materials.
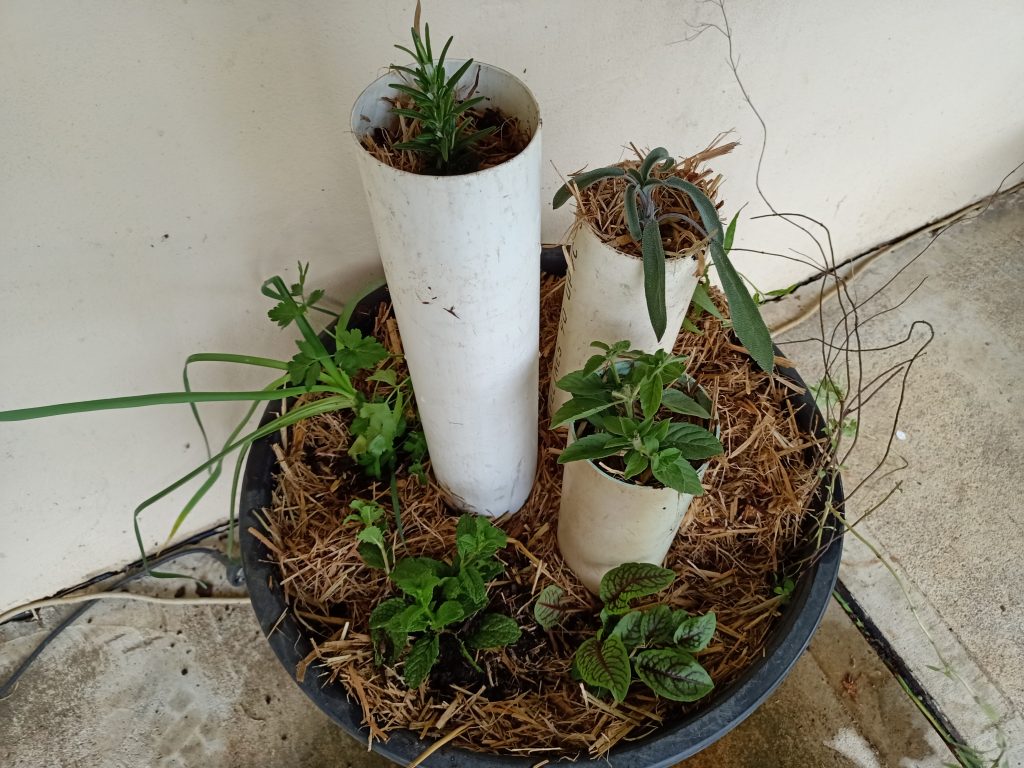
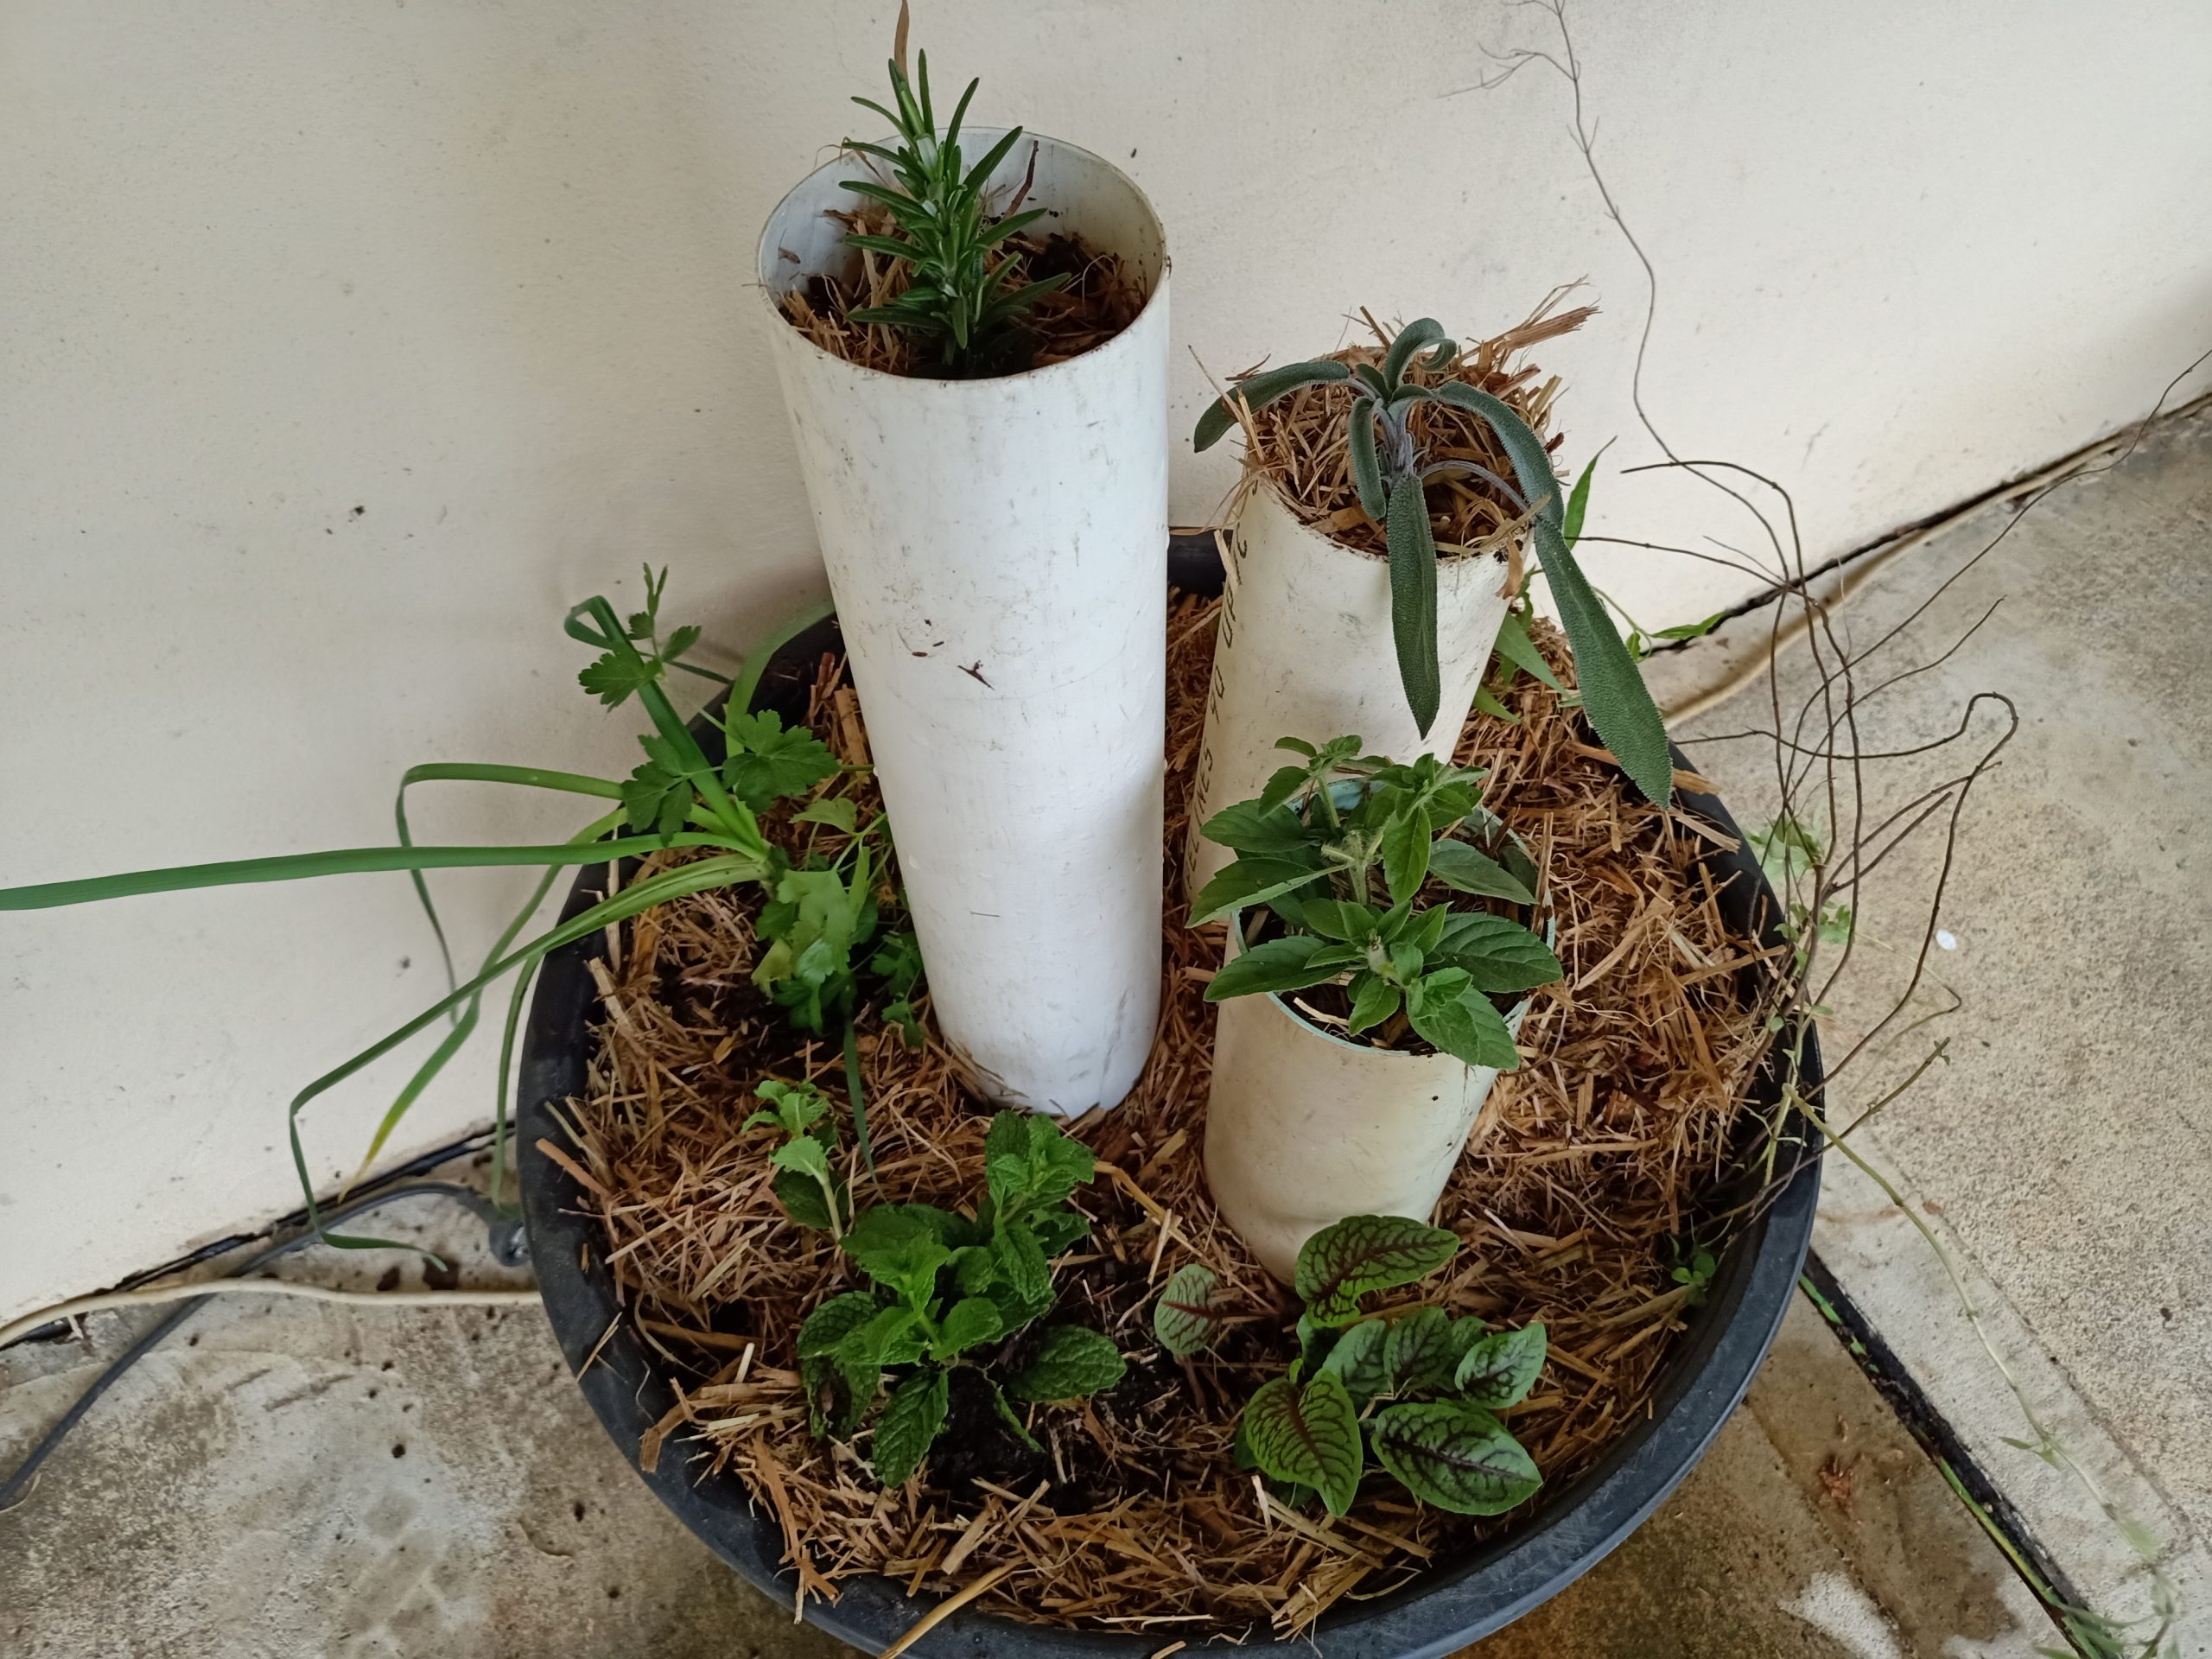
A very large flower pot that was laying around in the shed, a piece of thick plastic left over from a building project, and three pieces of PVC pipe that I also had laying around in the shed.
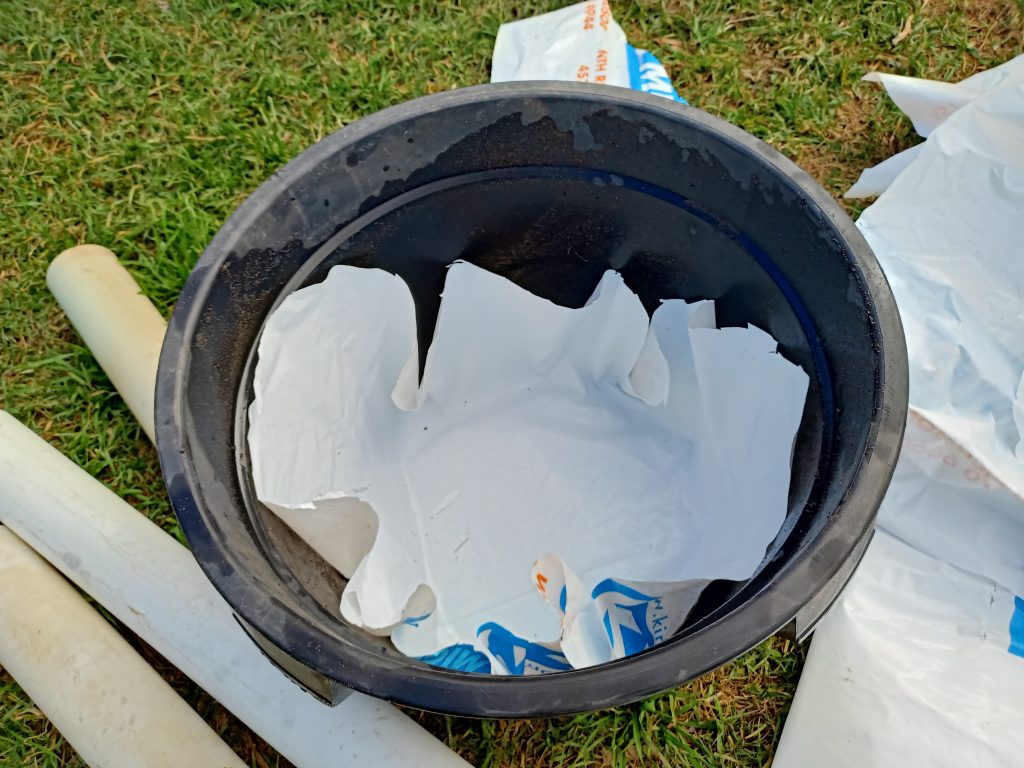
I cut a piece of the plastic and used it to line the bottom of the flower pot. I made sure there were no holes in the plastic and cut it so that it came up the sides to about 20cm from the top of the pot. This will be the water reservoir to my mini wicking bed.
This didn’t need to be neat or pretty – no one will ever see it – but I did need to make sure the lowest point in the plastic was right where I wanted it.
As an alternative, you could use a plastic tub with no holes in the bottom and drill an overflow hole 20 to 30cm from the top of the tub. No need to line the bottom with plastic in that instance.
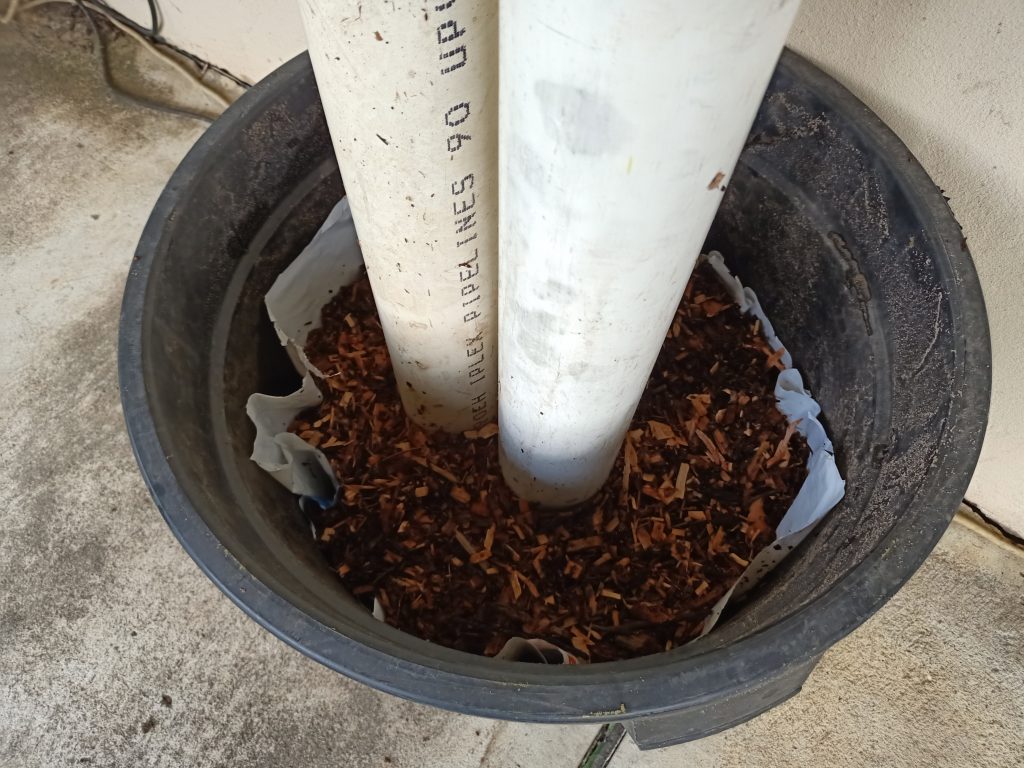
Next I positioned the three lengths of PVC pipe and half filled the pot (up to the level of the plastic) with woodchip. Yes, I hear you all gasping and wondering about nitrogen drawdown from buried woodchip. I will get to that but to quickly explain what nitrogen drawdown is – As soil microbes decompose organic matter high in carbon (in this case the woodchips) they need nitrogen to complete this process so they draw nitrogen out of the soil. This nitrogen however is not “lost”, it is only temporarily locked up in microbes and as they die they begin to release the nitrogen back into your soil. Soil will acutally improve over time – but in the early stages you will have nitrogen drawdown to contend with.
If you add a layer of high nitrogen as a barrier between the woodchip and the soil then the microbes will take the nitrogen they need from this layer instead of your soil. Research shows that nitrogen drawdown only occurs within about a 5mm distance from the woodchip.
I chose to use woodchip because that is what I had available and I like that the woodchips will create a healthy fungal network as they break down but it you want something more long-lasting then gravel is usually used as the medium in the bottom of wicking beds.
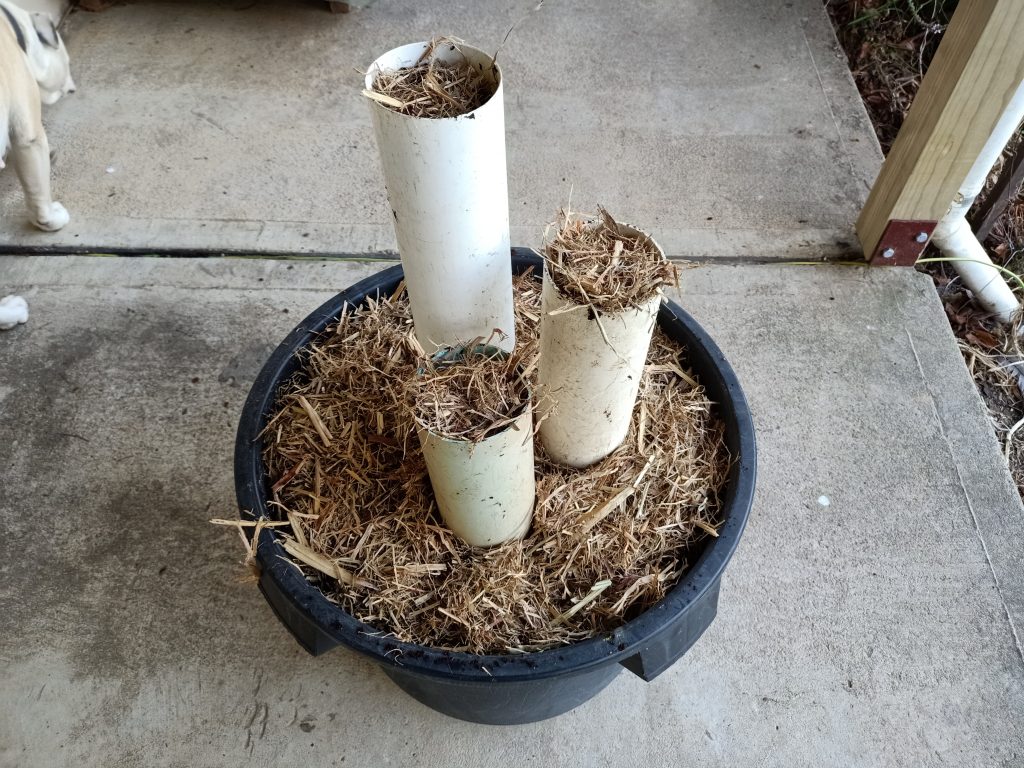
Next I filled the PVC tubes and the flower pot with good soil and mulched ready for planting.
The three PVC pipes will create various moisture levels to accommodate the needs of the different herbs. The tallest PVC pipe will be the driest as the soil has to draw the water the furtherest from the reservoir below. In this pipe I planted rosemary which is hardy in dry conditions. The next pipe down has sage (which also can cope with a little less water than some other herbs), then basil was next. The plants that love plenty of moisture go down the bottom planted into the flower pot. Mint, sorrel, and parsley for example.
And I am rather happy with the end result! Just a few hours work and using things I had laying around the yard. Now I have an easily accessible, low maintenance herb garden right on my veranda.